

Capturing video
Recording on a Smartphone
Smartphones, such as Apple or Android devices that connect to the internet and include a camera, often have very high quality cameras. Most of the videos you see online were recorded on a smartphone.
Below are some tips for recording high-quality video with an iPhone.
Camera Settings
Camera App
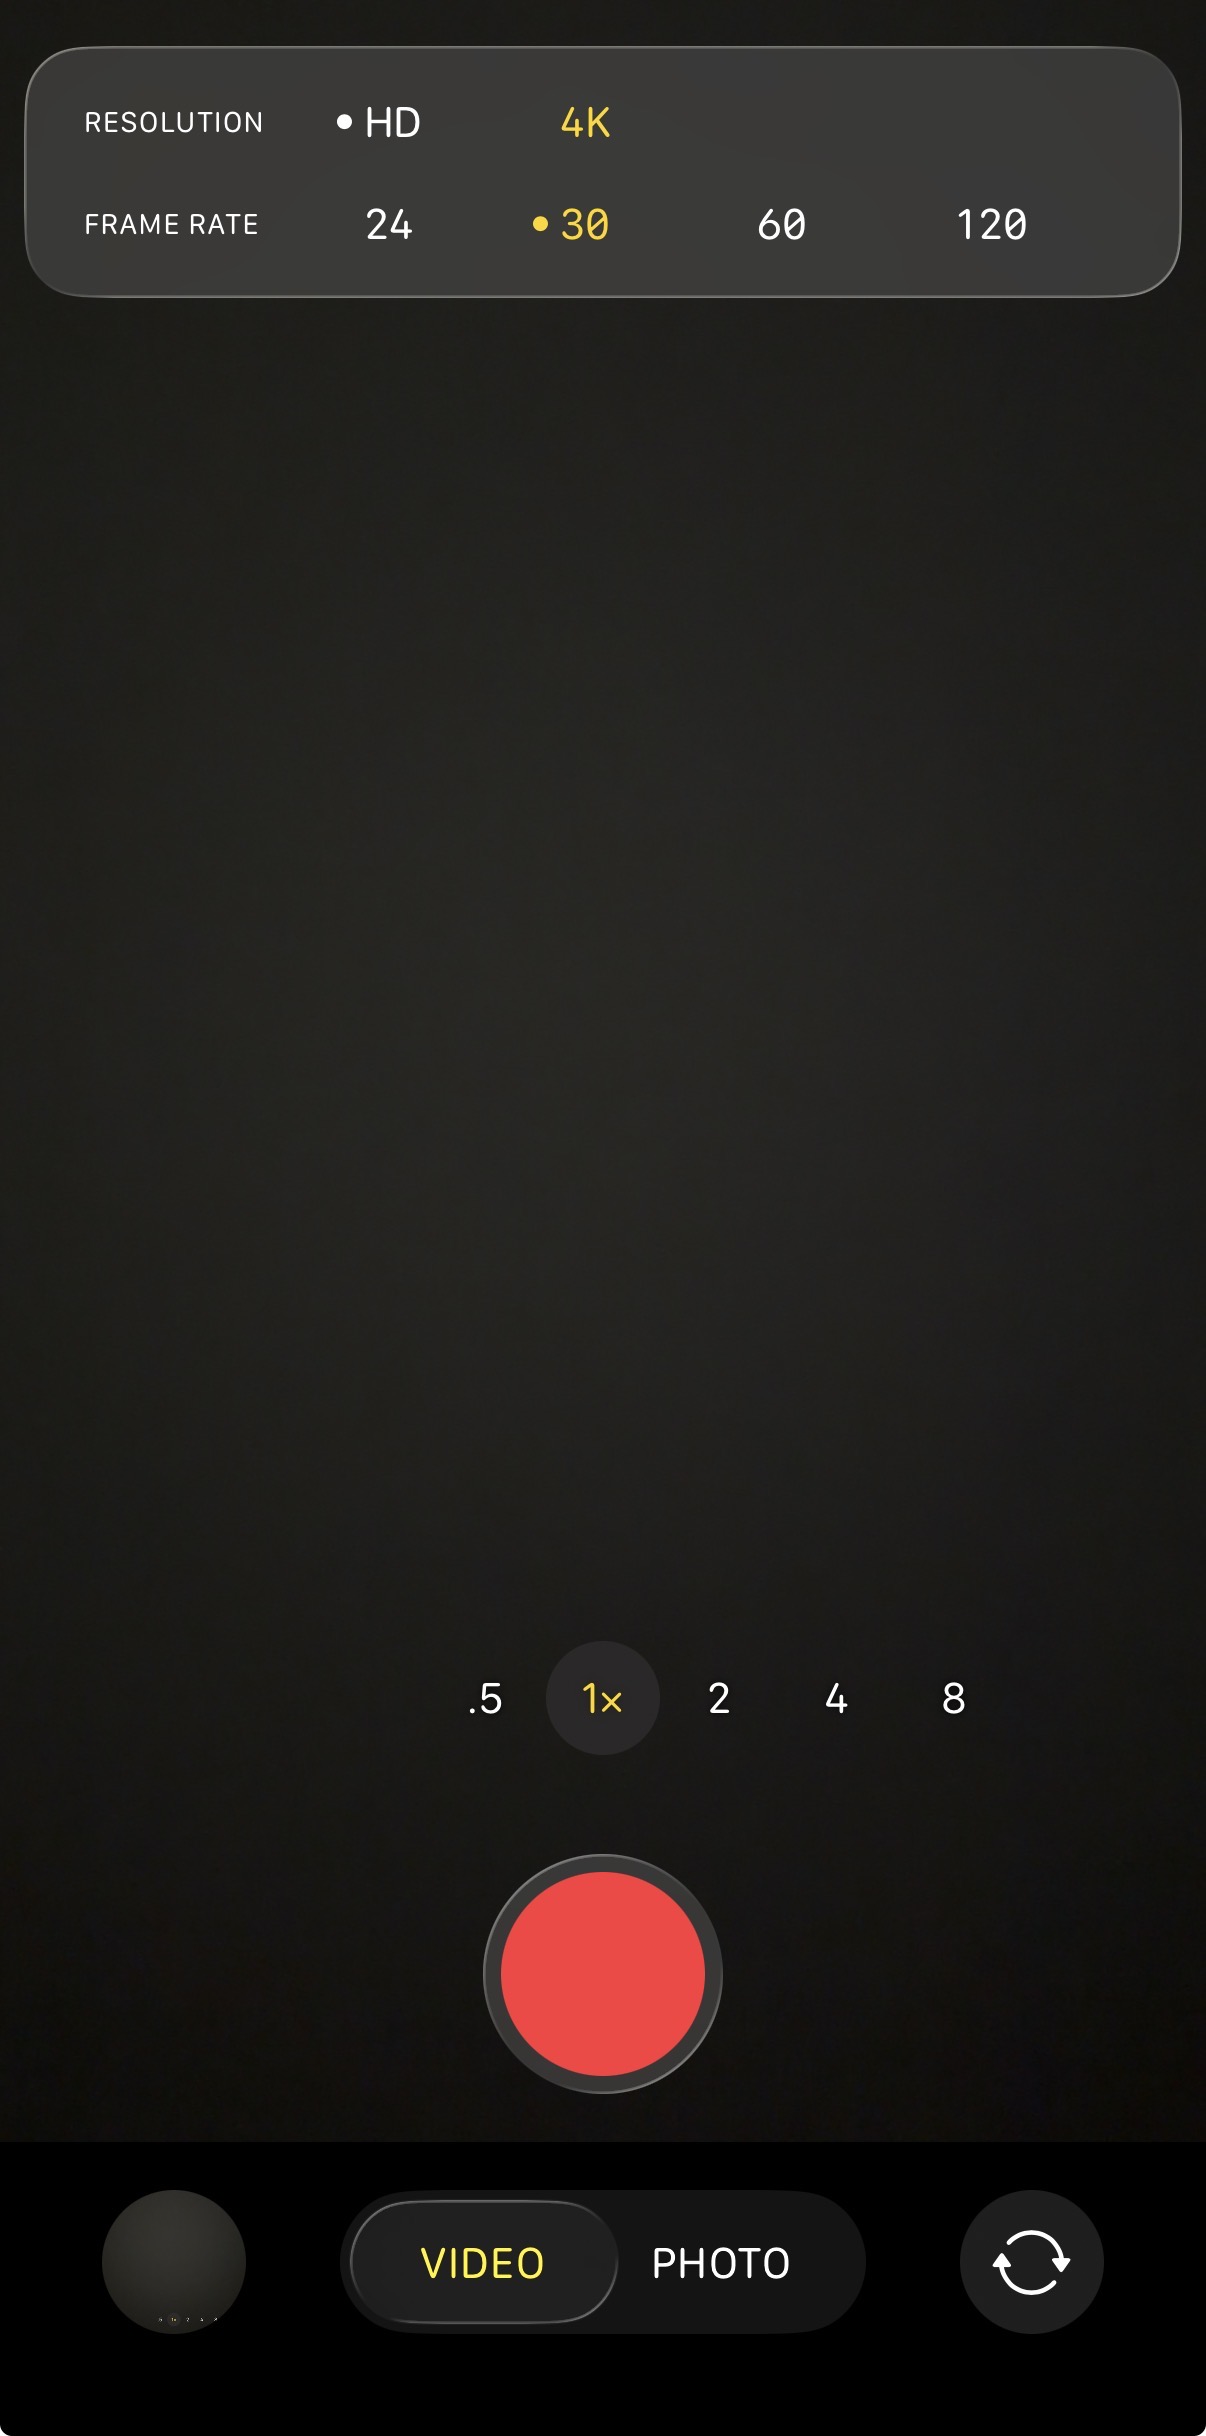
- Set the video to 4k in the top left corner of your screen.
- Set the frames to 30 frames per second in the top left corner of your screen.
- Turn on grid lines and the level feature.
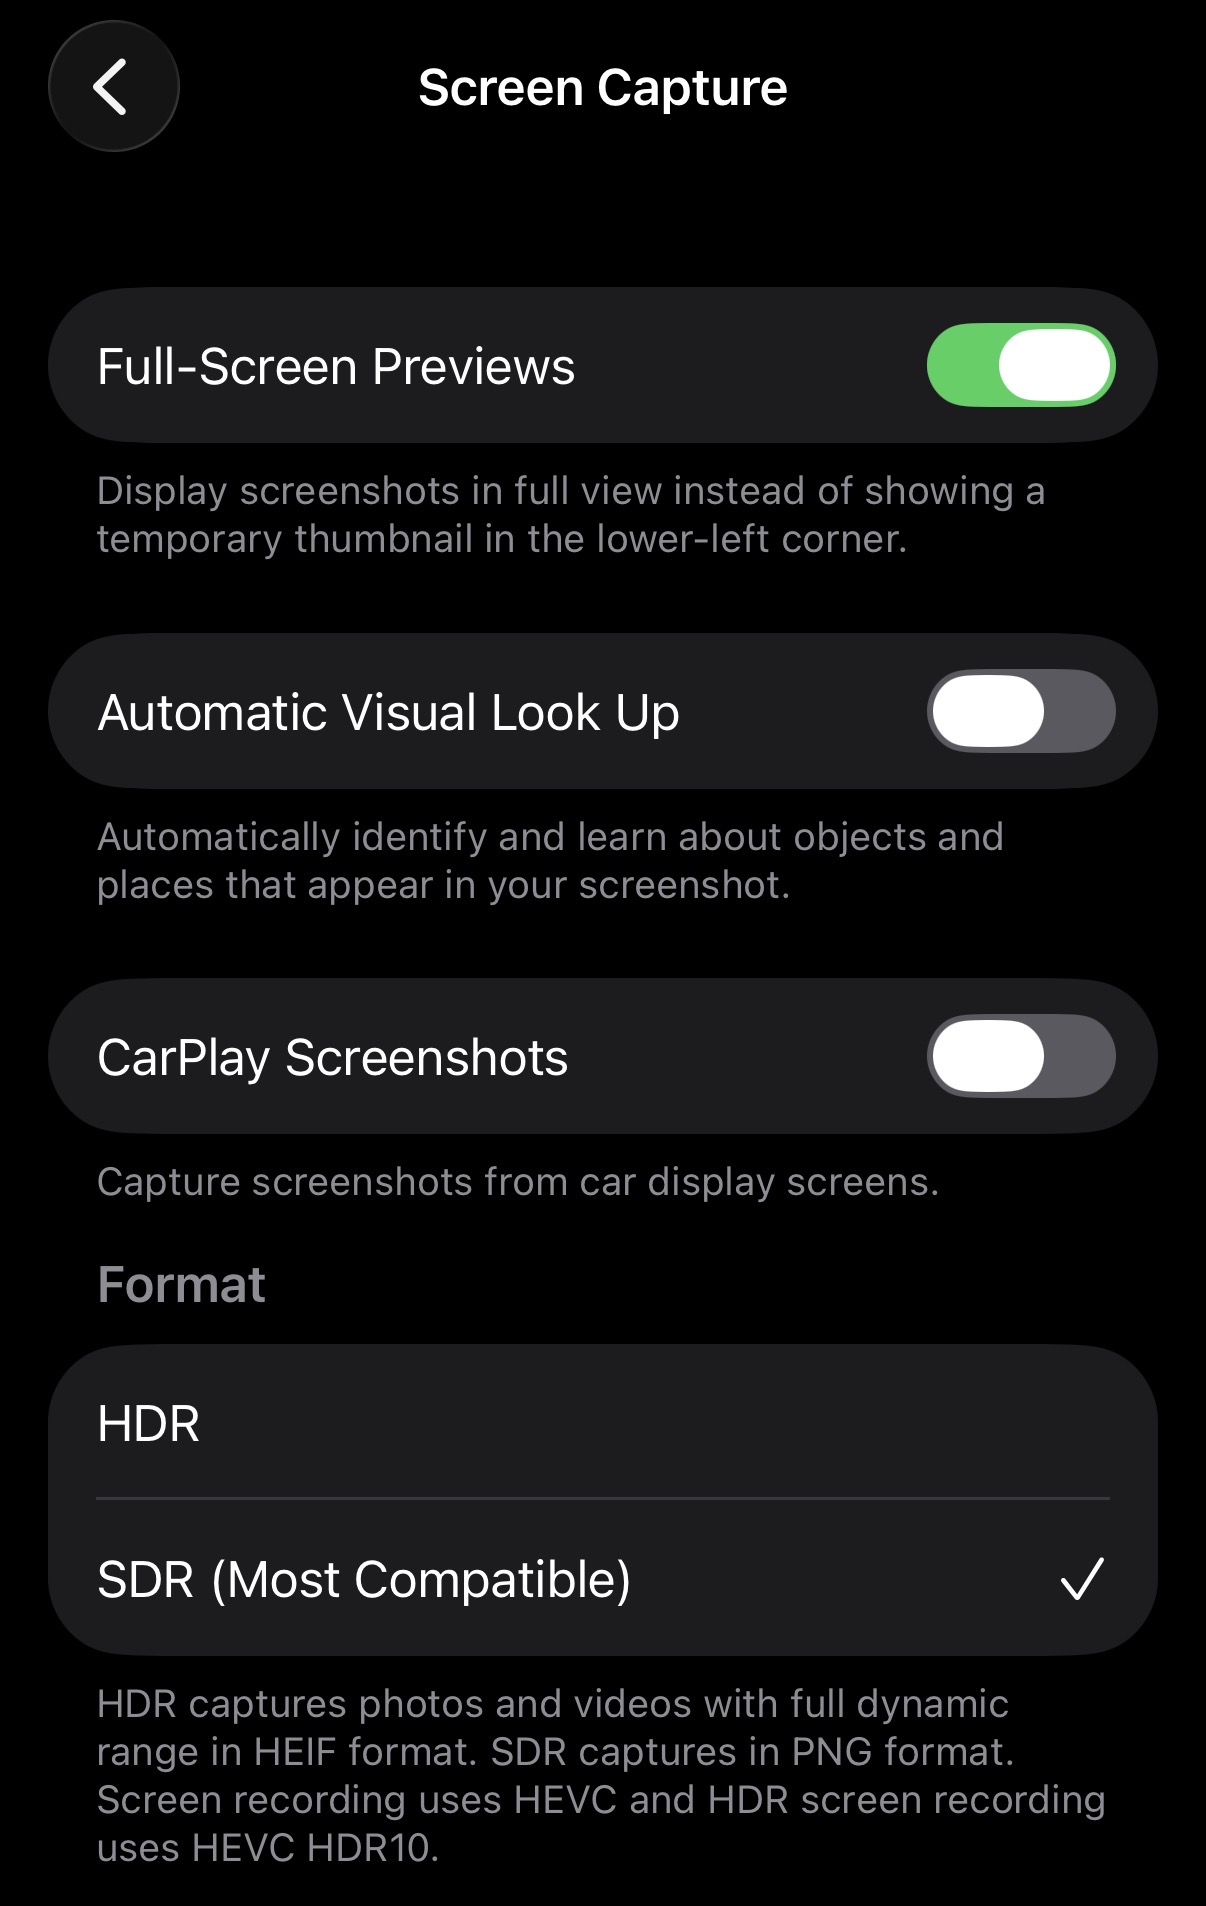
iPhone Settings App
Turn off HDR mode, as this setting will have weird effects on your video as you’re trying to export it.
For Android users, see this video: setting the best recording quality on Android.
Microphone
When recording on a smartphone, you can use wired earbuds or a Bluetooth clip mic that can plug into the port on your phone. Any mic with a pop filter—which will help to smooth out crackling noises—will work!
Recording on a digital camera
If you want higher quality video footage—maybe you’re making a longer video that will be shown in an auditorium or on a large screen—you may want to acquire a digital camera. You can often rent or borrow equipment, such as cameras and tripods, from a public library, college, or other local institution. When picking a camera to borrow, make sure it’s suited for the kind of project you want to do.
Here are guides to choosing Nikon and Canon cameras.
Once you have your camera, watch or read through a few tutorials on how to use it.
Though every camera is different, there are a few best practices that stand for all of them:
- Make sure that your rental includes a charger for the battery and a cord for exporting the footage.
- Higher quality cameras pick up on lighting a little more harshly, so:
- If there is a light source, make sure the subject is facing diagonally toward it so it falls softly on the subject
- Whenever you can, use natural light – it will always look better
- Test the microphone of your camera before recording with it, and if the quality is not as good as you would like, record separate audio with Bluetooth clip mics.
General Recording Best Practices
B-Roll
- It’s always helpful to have compiled footage of your group’s activities, but don’t let recording become a burden to your group’s work.
- A great option for b-roll is video of local performance art, like a dance show or theater production
Filming for short-form video
- If you’re filming for Instagram Reels, TikTok, or YouTube Shorts, make sure you’re capturing vertical footage (the image is taller than it is wide). For longer form video, horizontal footage (the image is wider than it is tall) is more appropriate.
- Go into recording your clips with an idea of what you want to see in the final video. If you capture lots of random footage, a short form video can feel thrown together instead of curated and intentional.
- Short form videos should be immediately attention grabbing, so make sure to have a few different subjects.
- Ex. Record an interview with someone at an event as well as b-roll of the event taking place and overlay/cut between the two
Interviewing
Beware of background noise – find as quiet a spot as possible. If you can’t find a completely quiet spot, opt for a space with less ambient noise or echo – for example, a room with rugs, furniture, and upholstered items will be a better recording space than an empty room with wooden floors. Carpeted rooms work well, and rooms with curtains or other drapery provide better acoustics.
Make sure your interviewee is comfortable. Before interviewing, let the camera roll and do some small talk – get people comfortable and acclimated to the camera. Make them laugh!
Establish a shared understanding of consent. Come to an agreement on the answers to these questions:
- What happens when the interviewee wants to answer a question again, or doesn’t like how they answered a question the first time?
- Can the interviewee ask for a portion of the recorded interview not to be used?
- Can the interviewee opt out of the interview if they become uncomfortable?
Have folks face on a diagonal away from the camera. This looks nice visually and is also more comfortable for interviewees. It’s often best to avoid having interviewees directly into the camera.
Ask interviewees to wait a few moments after the question is asked to begin answering.
Clap before asking a question to be able to sync up on the audio and video files. You can match the sound waves in your video editor.
Recommend that an interviewee repeat the question back to you when answering.
Ex. Q: “What’s your favorite food?” – A1: “I like pizza.” v. A2: “My favorite food is pizza.”
Anonymity in Video
If an interviewee wants to remain anonymous, there are lots of ways to make that happen while ensuring the video is still visually engaging, and that the interviewee feels represented by the footage.
You can contract a local artist to interpret the story through art. People can be reflected without having their individual identity exposed, and a dance piece by a local artist or drawn visual of the story being told in voice over can be a great way to do that.
You can use pseudonyms and change some basic biographical information about your interviewees when introducing them on screen. You can change age, name, gender, location, and other identifying information.
There are also some great videographic techniques for hiding faces:
- You can record somebody’s non-identifying physical details like their hands or ears.
- You can use a bright light to obscure someone’s face on video.
Editing platforms have sound distortion features, and you can use them to distort the voice of your interviewee.
Additional Resources
Editing
Short Form Video
Editing video for short-form content types, like Instagram Reels, TikTok, and YouTube Shorts, is harder than it looks. While the algorithms that drive discoverability on these platforms are hard to predict, there are some steps you can take when editing to help your videos reach a wider audience.
First, consider: Who is your audience?
If your audience is younger, say teens and young adults, you can speak at a faster pace when recording – and plan for that pace as you write the script. If you spend a few minutes scrolling through any of these short form video platforms, you’ll notice that most of these creators are talking at a mile a minute, often in odd voices. These are techniques to immediately grab your viewer’s attention. If your audience is young, they might be good methods to try.
If your audience is older, speak at a slower, more natural pace.
The Hook
The secret to hacking the short form content algorithm is the hook. Try to grab your viewer in the first three seconds. You’ll have to experiment with what works, but try asking yourself:
What are the problems your audience is facing in day-to-day life?
Pose one of those problems in the first three seconds and answer it in the video.
What to do with your logo?
When editing, you might be inclined to add your organization logo or icon to the corner of the screen so that viewers know that the content is from you.
But this can backfire—if a logo is visibly on the screen throughout the video, the platform algorithm can mistake it for content exported from another app and won’t promote it as heavily.
Instead, you can cut to an “end card,” a still graphic that includes your logo and some information about your organization, at the end of the video.
Tools
For editing short-form content, Canva and CapCut are two great, free options. CapCut has a lot of free video templates you can use to make the process easier. You can also edit your videos within the TikTok and Instagram apps.
Long Form Video
Longer form videos—documentaries, videos for your website highlighting your group’s mission, edited interviews, and more—can be great methods of storytelling. This form is a great way to archive your group’s work, an opportunity to bring people together physically at a screening of your video, and a way to explore the benefits of visual storytelling without having to cater so heavily to an algorithm.
Some general best practices:
If you are incorporating an interview, when editing you can display the interviewee’s name and other relevant identifying information in the lower third of the screen (chyron). This is especially helpful when you are incorporating several interviews into a single video.
B-roll is a great way to diversify your video visuals. It can be stock footage (there is some on Canva licensed to use, and plenty more free stock video out there), but you can also get more personal with it. You can walk around your community and film the landscape, the animals, the storefronts—this can immerse your audience in the feel of your community. You can even ask members of your community to submit photos and add some motion in the editing process, so that the screen pans down across an image for a few seconds—this is called the Ken Burns effect.
If the content is technical, it can be helpful to have some kind of illustration to aid in your explanation. You can digitally create some graphics, record yourself drawing everything out on a whiteboard or sheet of paper, or ask a local artist to do the same.
Vox Explainer videos are a great example of engaging graphics in video explanation.
Captions
For both long and short form video, it’s important to include your own captioning. Automatically generated captions can get words or details—especially names of people and places—really wrong.
Open vs. Closed Captions
The main difference between the two kinds of captioning is whether you, as the viewer, can turn them off. Open captions appear as part of the video and cannot be toggled on or off, while closed captions can be.
For any short-form content, incorporate open captions within the video itself. You can add these through TikTok or Instagram, but Canva and CapCut also have easy transcription services.
For anything longer than a TikTok, you should use closed captions. You can use a transcription service to transcribe your video and then review and edit the transcript or write one yourself.
- Rev.com is a transcription service with non-AI, human transcription options.
- Sonix.ai and other AI transcription services are also available.
You can export your captions as a .srt file — a file containing both subtitles and timing information — and upload it to YouTube or whatever video player you are using alongside the video itself. Viewers will then be able to toggle on and off your captions, as opposed to automatically generated ones. If using an AI-powered transcription software, ensure that interviewees consent to their information being put through this software, even if anonymous.
Sometimes, speakers will be speaking in a different language, and you want to caption the video both in the original language and in English. This is bilingual content, and you must take special care in captioning these videos.
For long form videos, upload two .srt files – one in each language.
For short form videos, it’s important to know that these videos don’t typically do well algorithmically. If you are posting bilingual content as a Reel or TikTok, write up both open captions and differentiate the two in visual style—for example, English in blue, Spanish in purple.


